Skip to content

This is the multi-page printable view of this section. .

Return to the regular view of this page.

APP

Run self-hosting application templates with pigsty and docker composes
Supabase
    Self-Hosting Supabase
Odoo
    Run Odoo the OSS ERP
Dify
    Run Dify the AI workflow
pgAdmin
    Run official Admin GUI Tool

1 - Playbook

Run docker compose application

Pigsty has built-in support for Docker and a series software that use PostgreSQL as primary storage.

You can run stateless application with docker compose, and store the data in the external HA PostgreSQL (Redis/MinIO/…) clusters.

There’s a dedicate playbook app.yml that can help your running docker compose app easily

2 - pgAdmin

Launch the official GUI Admin Tool for PostgreSQL

pgAdmin is the most popular and feature rich Open Source administration and development platform for PostgreSQL, the most advanced Open Source database in the world.


Quick Start

Pigsty has built-in (but optional) support for pgAdmin, it launches pgadmin with Docker Compose:

./docker.yml
./app.yml -e app=pgadmin

The default port for pgadmin is 8885, and you can access it through IP:Port : http://10.10.10.10:8885.

The default credentials are defined in .env, username: [email protected], password: pigsty.


Customize

Customize the pgadmin configuration in /opt/pgadmin/.env and manage it with docker compose.

You can also customize the apps parameter and override default .env configuration with:

all:
  children:

    infra:
      hosts:
        10.10.10.10: { infra_seq: 1 }
      vars:
        docker_enabled: true
        app: pgadmin  # specify app name (pgadmin) to be installed (in the apps)
        apps:         # define all applications
          supabase:   # the definition of pgadmin app
            conf:     # override /opt/supabase/.env

              PGADMIN_DEFAULT_EMAIL: [email protected]
              PGADMIN_DEFAULT_PASSWORD: yourPassword

              PGADMIN_LISTEN_ADDRESS: 0.0.0.0
              PGADMIN_PORT: 8885
              PGADMIN_SERVER_JSON_FILE: /pgadmin4/servers.json
              PGADMIN_REPLACE_SERVERS_ON_STARTUP: true

To launch the application, run:

./app.yml -l infra

Domain & Cert

To access pgadmin through nginx (rather than access port 8885 directly), configure the infra portal with:

pigsty.yml
all:
  vars:
    infra_portal:
      home         : { domain: h.pigsty }
      grafana      : { domain: g.pigsty ,endpoint: "${admin_ip}:3000" , websocket: true }
      prometheus   : { domain: p.pigsty ,endpoint: "${admin_ip}:9058" }
      alertmanager : { domain: a.pigsty ,endpoint: "${admin_ip}:9059" }
      blackbox     : { endpoint: "${admin_ip}:9115" }
      loki         : { endpoint: "${admin_ip}:3100" }

      # add pgadmin upstream server definition here
      pgadmin      : { domain: adm.pigsty  ,endpoint: "127.0.0.1:8885" }

Then run make nginx to update nginx config, and configure local static DNS record <your_ip_address> adm.pigsty in /etc/hosts or local / public DNS server.

Pigsty will issue self-signed SSL certs for the domains listed in infra_portal automatically. If you want to use real domain names, define cerbot entry and run make cert, check SSL Certs for details.

all:
  vars:        # make sure your domain name (adm.pigsty.cc) is resolved to your public IP
    certbot_sign: true   # sign real HTTPS certs with certbot (Internet access required!)
    infra_portal:
      pgadmin : { domain: adm.pigsty.cc  ,endpoint: "127.0.0.1:8885", certbot: adm.pigsty.cc }

3 - Supabase

Self-host enterprise-grade Supabase with Pigsty, featuring monitoring, high availability, PITR, IaC, and 400+ PostgreSQL extensions.

Supabase is great, but having your own Supabase is even better. Pigsty helps you build enterprise-grade Supabase on your own servers (physical/virtual machines/cloud servers) with one-click deployment — more extensions, better performance, deeper control, and much more cost-effective.

Pigsty is one of the three 3rd party self-hosting tutorials listed in the official Supabase docs


Quick Start

Prepare a Linux server, follow the Pigsty standard installation process, select the supabase configuration template, and execute the following commands:

curl -fsSL https://repo.pigsty.io/get | bash -s v3.7.0; cd ~/pigsty
./configure -c supabase    # Use supabase configuration (please change credentials in pigsty.yml)
vi pigsty.yml              # Edit domain, passwords, keys...
./install.yml              # Install pigsty
./docker.yml               # Install docker compose components
./app.yml                  # Start supabase stateless components with docker (may be slow)

After installation, visit port 8000 in your browser to access Supa Studio, username supabase, password pigsty.
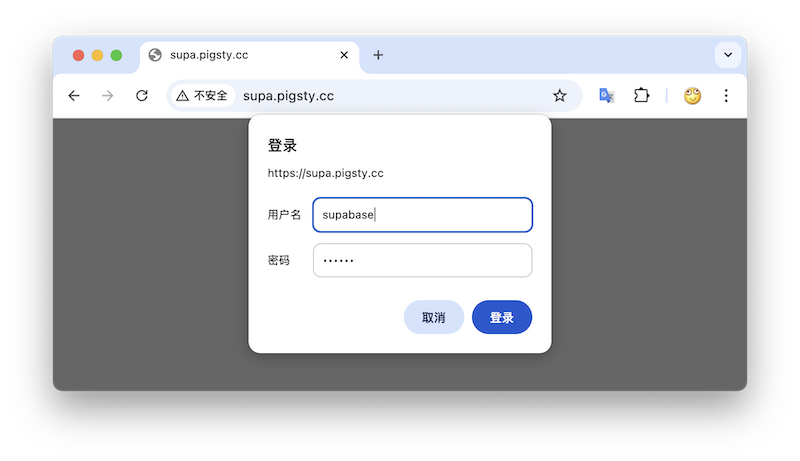

Table of Contents


What is Supabase?

Supabase is a BaaS (Backend as Service), an open-source Firebase alternative, and the most popular database + backend solution in the AI Agent era. Supabase wraps PostgreSQL and provides authentication, messaging, edge functions, object storage, and automatically generates REST API and GraphQL API based on PostgreSQL database schemas.

Supabase aims to provide developers with a one-stop backend solution, reducing the complexity of developing and maintaining backend infrastructure. It allows developers to eliminate most backend development work — developers only need to understand database design and frontend to quickly deliver applications! Developers can quickly complete a full application with just frontend development and database schema design using Vibe Coding.

Currently, Supabase is the most popular open-source project in the PostgreSQL open-source ecosystem, with 80,000 stars on GitHub. Supabase also provides “generous” free cloud service quotas for small entrepreneurs — 500 MB of free space, which is sufficient for storing user tables, view counts, and similar data.


Why Self-Host?

Since Supabase cloud service is so attractive, why self-host?

The most intuitive reason is what we mentioned in “Are Cloud Databases an Intelligence Tax?”: when your data/computing scale exceeds the cloud computing applicable spectrum (Supabase: 4C/8G/500MB free storage), costs can easily explode. Moreover, currently, sufficiently reliable local enterprise-grade NVMe SSDs have a three to four order of magnitude advantage in cost-effectiveness compared to cloud storage, and self-hosting can better leverage this advantage.

Another important reason is functionality — Supabase cloud service functionality is limited. Many powerful PostgreSQL extensions cannot be provided as cloud services due to multi-tenant security challenges and licensing issues. Therefore, although extensions are PostgreSQL’s core feature, only 64 extensions are available on Supabase cloud service. Self-built Supabase with Pigsty provides up to 437 ready-to-use PostgreSQL extensions.

Additionally, autonomy and avoiding vendor lock-in are important reasons for self-hosting — although Supabase aims to provide an open-source alternative to Google Firebase without vendor lock-in, the threshold for self-building enterprise-grade Supabase to high standards is actually quite high. Supabase includes a series of PostgreSQL extension plugins developed and maintained by them, and plans to replace the native PostgreSQL kernel with the acquired OrioleDB, but these kernels and extensions are not provided in the official PGDG repository.

This is actually a form of implicit vendor lock-in, preventing users from self-building using methods other than the supabase/postgres Docker image. Pigsty provides an open-source, transparent, and universal solution to solve this problem. We package all 10 missing extensions developed and used by Supabase into ready-to-use RPM/DEB packages, ensuring they are available on all mainstream Linux operating system distributions:

Extension Description
pg_graphql Provides GraphQL support within PostgreSQL (RUST), Rust extension, provided by PIGSTY
pg_jsonschema Provides JSON Schema validation capability, Rust extension, provided by PIGSTY
wrappers Supabase’s external data source wrapper bundle, Rust extension, provided by PIGSTY
index_advisor Query index advisor, SQL extension, provided by PIGSTY
pg_net Extension for asynchronous non-blocking HTTP/HTTPS requests with SQL (supabase), C extension, provided by PIGSTY
vault Extension for storing encrypted credentials in Vault (supabase), C extension, provided by PIGSTY
pgjwt PostgreSQL implementation of JSON Web Token API (supabase), SQL extension, provided by PIGSTY
pgsodium Table data encryption storage TDE, extension, provided by PIGSTY
supautils Used to ensure database cluster security in cloud environments, C extension, provided by PIGSTY
pg_plan_filter Filter and block specific query statements using execution plan costs, C extension, provided by PIGSTY

Meanwhile, we install most extensions by default in Supabase self-hosting deployment. You can refer to the available extension list to enable them as needed.

Additionally, Pigsty handles the automatic setup of underlying high availability PostgreSQL database clusters, high availability MinIO object storage clusters, and even Docker container infrastructure deployment and Nginx reverse proxy, domain configuration and HTTPS certificate issuance. You can deploy any number of stateless Supabase container clusters using Docker Compose and store state in external Pigsty self-hosted database services.

In this self-hosting deployment architecture, you gain the freedom to use different kernels (PostgreSQL 15-18, OrioleDB), the freedom to install 437 extensions, the freedom to scale Supabase/Postgres/MinIO, the freedom from database operational chores, and the freedom from vendor lock-in to run locally indefinitely. Compared to the cost of using cloud services, the price is just preparing servers and typing a few more commands.


Single Node Quick Start

Let’s start with single-node Supabase deployment. We’ll introduce multi-node high availability deployment methods later.

Prepare a fresh Linux server, use the supabase configuration template provided by Pigsty to execute the standard installation process, then additionally run docker.yml and app.yml to deploy the stateless Supabase containers (default ports 8000/8433).

curl -fsSL https://repo.pigsty.io/get | bash -s v3.7.0; cd ~/pigsty
./configure -c supabase    # Use supabase configuration (please change credentials in pigsty.yml)
vi pigsty.yml              # Edit domain, passwords, keys...
./install.yml              # Install pigsty
./docker.yml               # Install docker compose components
./app.yml                  # Start supabase stateless components with docker

Before deploying Supabase, please modify the parameters (domain and passwords) in the automatically generated pigsty.yml configuration file according to your actual situation. If it’s just local development testing, you can skip this for now. We’ll introduce how to further customize through configuration file modifications later.
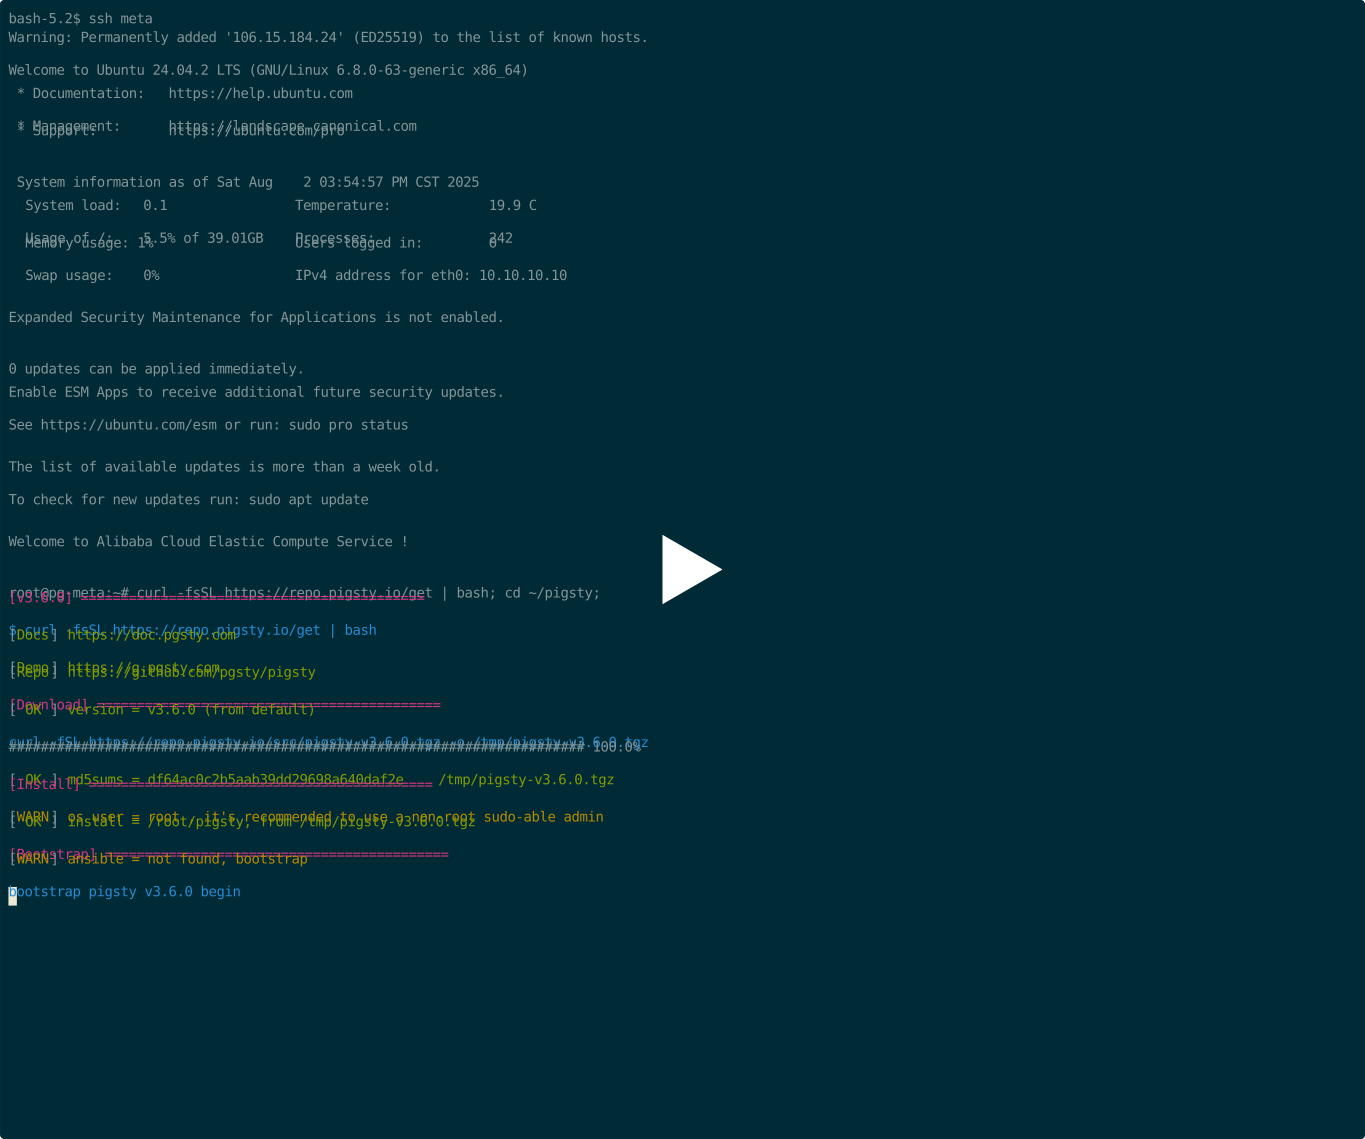
asciicast

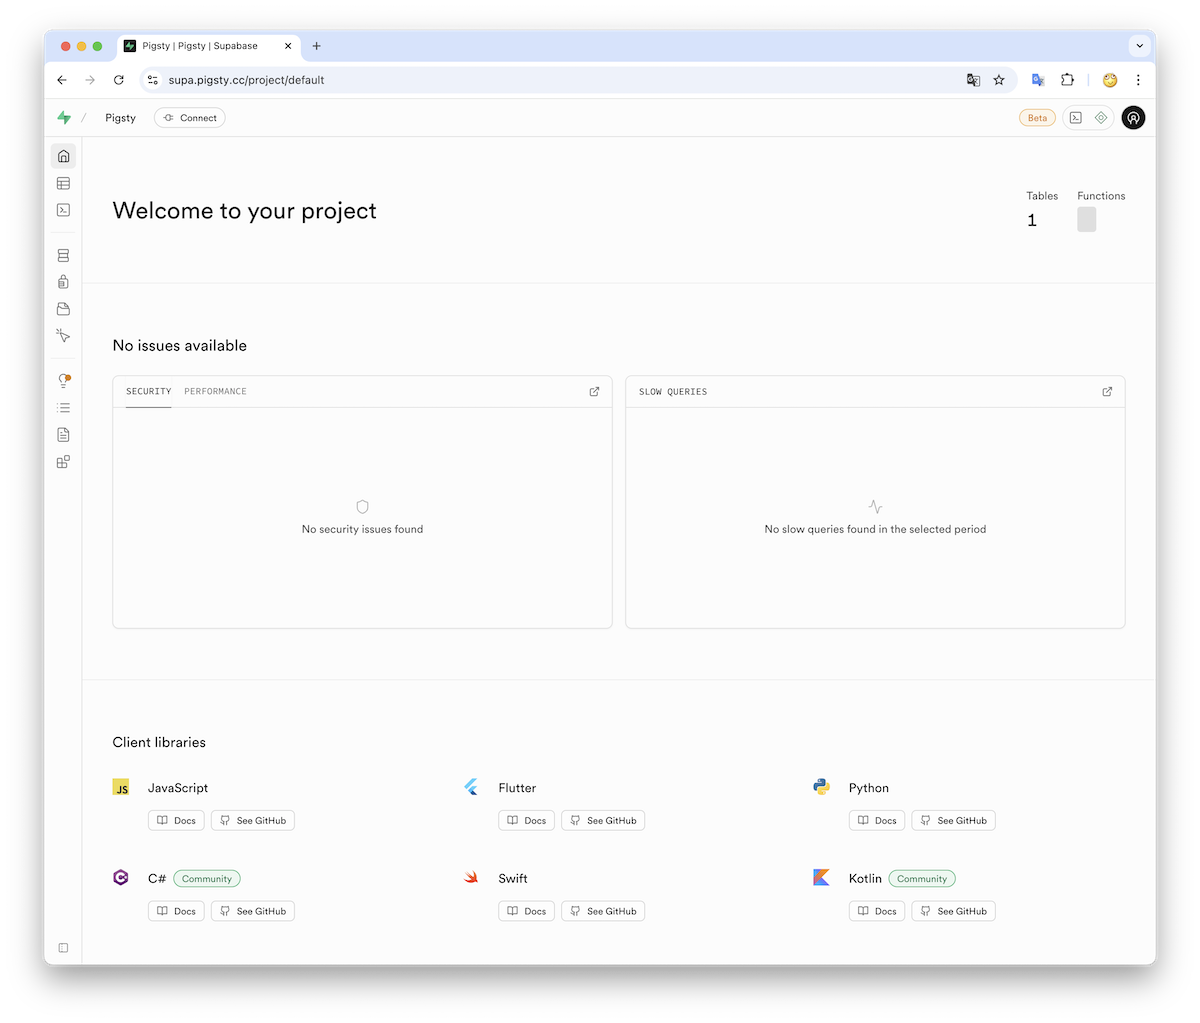
If configured correctly, after about ten minutes, you can access the Supabase Studio graphical management interface locally via http://<your_ip_address>:8000. The default username and password are: supabase and pigsty.
DockerHub blocked in mainland China

In mainland China, Pigsty uses DockerHub mirror sites provided by 1Panel and 1ms to download Supabase-related images by default, which may be slow. You can also configure proxy and mirror sites yourself, or manually pull images with cd /opt/supabase; docker compose pull. We also provide Supabase self-hosting expert consulting services including complete offline installation solutions.

Using Supabase object storage requires HTTPS/domain

If you need to use object storage functionality, you need to access Supabase via domain and HTTPS, otherwise errors will occur.

Please change passwords for production deployment!

For serious production deployments, must change all default passwords!


Key Technical Decisions for Self-Hosting

Here are some key technical decisions involved in self-hosting Supabase for your reference:

Using the default single-node deployment, Supabase cannot enjoy PostgreSQL/MinIO high availability capabilities. Nevertheless, single-node deployment still has significant advantages compared to the official pure Docker Compose solution: for example, out-of-the-box monitoring systems, the ability to freely install extensions, component scaling capabilities, and providing fallback database point-in-time recovery capabilities.

If you only have one server or choose to self-host on cloud servers, Pigsty recommends using external S3 instead of local MinIO as object storage to store PostgreSQL backups and support Supabase Storage services. Such deployment can provide a fallback-level RTO (hour-level recovery time)/RPO (MB-level data loss) disaster recovery level under single-machine deployment conditions during failures.

In serious production deployments, Pigsty recommends using at least 3-4 node deployment strategies to ensure both MinIO and PostgreSQL use multi-node deployments that meet enterprise-grade high availability requirements. In this case, you need to prepare more nodes and disks accordingly and adjust cluster configurations in the pigsty.yml configuration manifest, as well as access information in supabase cluster configuration to use high availability access points.

Some Supabase functionality requires sending emails, so SMTP services are needed. Unless purely for internal networks, for serious production deployments, using SMTP cloud services is recommended. Self-built email servers easily have their emails marked as spam and rejected.

If your service is directly exposed to the public network, we strongly recommend using real domains and HTTPS certificates and accessing through Nginx Portal.

Next, we’ll discuss some advanced topics in sequence: how to further improve Supabase security, availability, and performance based on single-node deployment.


Advanced Topic: Security Hardening

Pigsty Base Components

For serious production deployments, we strongly recommend changing Pigsty default passwords. Because these default values are public and well-known, going to production without changing passwords is like streaking:

The above passwords are for Pigsty component modules and are strongly recommended to be set before installation and deployment.

Supabase Keys

In addition to Pigsty component passwords, you also need to modify Supabase keys, including:

Please refer to the Supabase tutorial: Securing your services instructions:

  • Generate a JWT_SECRET longer than 40 characters and use the tools in the tutorial to sign ANON_KEY and SERVICE_ROLE_KEY JWTs.
  • Use the tools provided in the tutorial to generate an ANON_KEY JWT based on JWT_SECRET and expiration time attributes. This is the credential for anonymous users.
  • Use the tools provided in the tutorial to generate a SERVICE_ROLE_KEY based on JWT_SECRET and expiration time attributes. This is the credential for higher-privilege service roles.
  • Setup PG_META_CRYPTO_KEY with a random string at least 32 char long for securing connection strings between Studio and postgres-meta
  • If your PostgreSQL business user uses a password different from the default, please modify the POSTGRES_PASSWORD value accordingly
  • If your object storage uses a password different from the default, please modify the S3_ACCESS_KEY and S3_SECRET_KEY values accordingly

After modifying Supabase credentials, you can restart Docker Compose containers to apply the new configuration:

./app.yml -t app_config,app_launch
cd /opt/supabase; make up

Advanced Topic: Domain Integration

If you’re using Supabase on localhost or within a LAN, you can choose IP:Port direct connection to Kong’s exposed HTTP port 8000 to access Supabase.

You can use an internal static DNS domain, but for serious production deployments, we recommend using real domain + HTTPS to access Supabase. In this case, your server should have a public IP address, you should own a domain, use DNS resolution services provided by cloud/DNS/CDN providers to point it to the installation node’s public IP (optional fallback: local /etc/hosts static resolution).

A simple approach is to batch replace the placeholder domain (supa.pigsty) with your actual domain, say supa.pigsty.cc:

sed -ie 's/supa.pigsty/supa.pigsty/g' ~/pigsty/pigsty.yml

If you haven’t configured it beforehand, reload Nginx and Supabase configurations:

make nginx      # Reload nginx configuration
make cert       # Apply for free HTTPS certificate with certbot
./app.yml       # Reload Supabase configuration

The modified configuration should look like the following snippet:

all:
  vars:
    infra_portal:
      supa :
        domain: supa.pigsty.cc        # Replace with your domain!
        endpoint: "10.10.10.10:8000"
        websocket: true
        certbot: supa.pigsty.cc       # Certificate name, usually same as domain

  children:
    supabase:
      vars:
          supabase:                                       # the definition of supabase app
            conf:                                         # override /opt/supabase/.env
              SITE_URL: https://supa.pigsty                # <------- Change This to your external domain name
              API_EXTERNAL_URL: https://supa.pigsty        # <------- Otherwise the storage api may not work!
              SUPABASE_PUBLIC_URL: https://supa.pigsty     # <------- DO NOT FORGET TO PUT IT IN infra_portal!

Complete domain/HTTPS configuration can refer to the Certificate Management tutorial. You can also use Pigsty’s built-in local static resolution and self-signed HTTPS certificates as fallback.
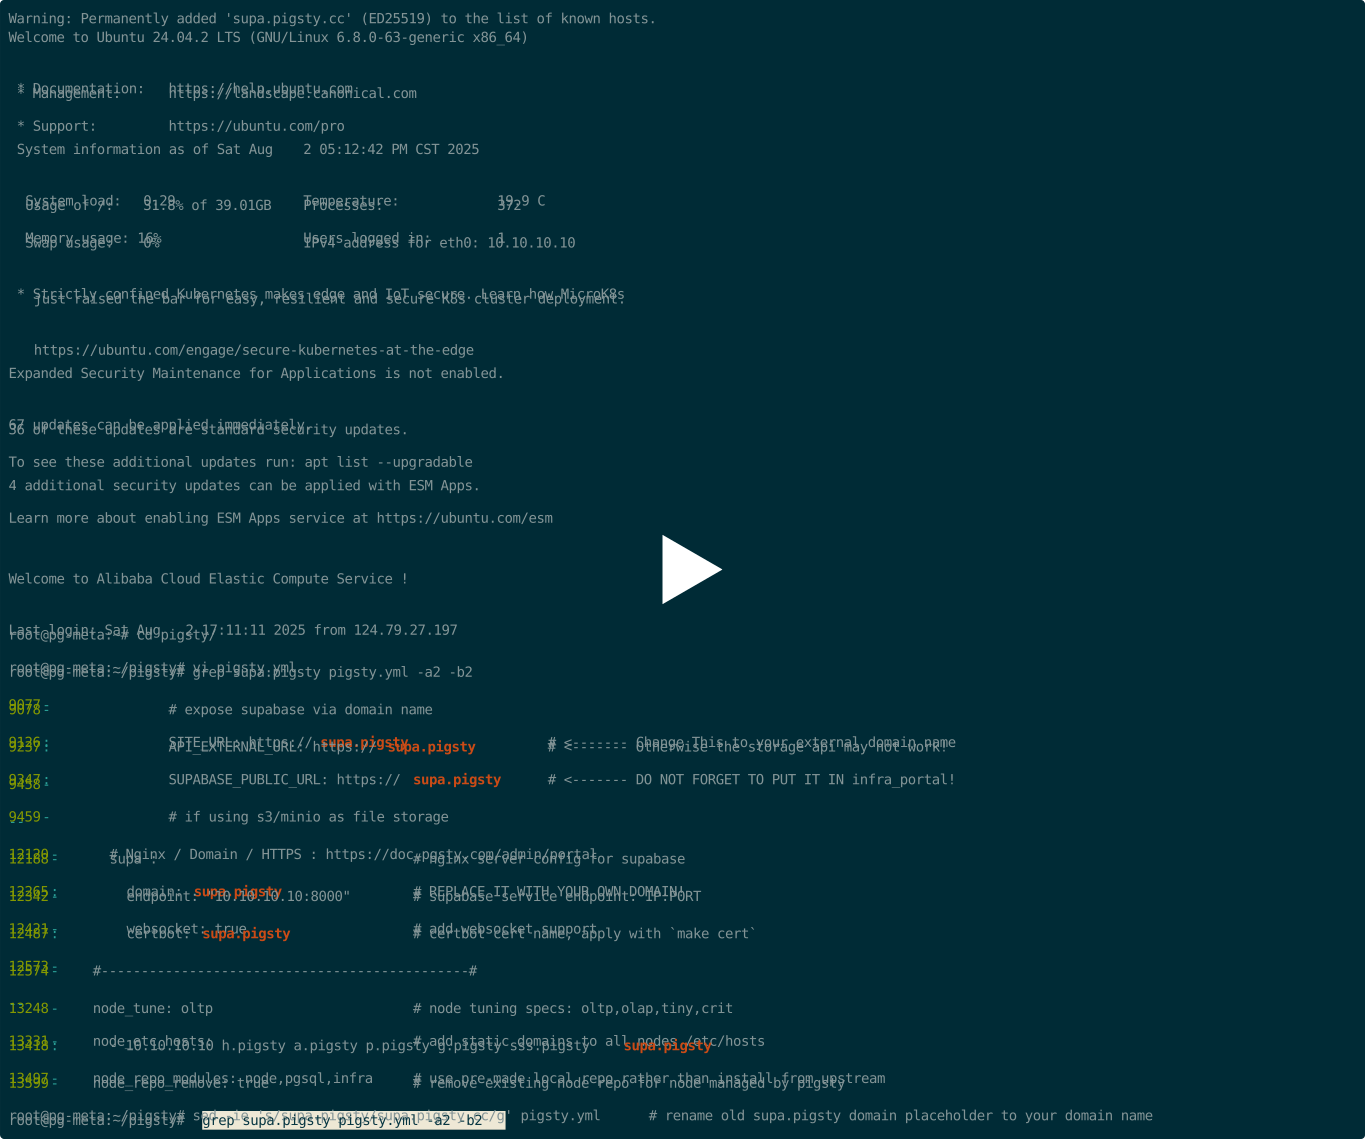
asciicast


Advanced Topic: External Object Storage

You can use S3 or S3-compatible services as object storage for PostgreSQL backups and Supabase usage. Here we use Alibaba Cloud OSS object storage as an example.

Pigsty provides a terraform/spec/aliyun-meta-s3.tf template that can be used to deploy a server and an OSS bucket on Alibaba Cloud.

First, modify the S3-related configuration in all.children.supa.vars.apps.[supabase].conf, pointing it to the Alibaba Cloud OSS bucket:

# if using s3/minio as file storage
S3_BUCKET: data                       # Replace with S3-compatible service connection information
S3_ENDPOINT: https://sss.pigsty:9000  # Replace with S3-compatible service connection information
S3_ACCESS_KEY: s3user_data            # Replace with S3-compatible service connection information
S3_SECRET_KEY: S3User.Data            # Replace with S3-compatible service connection information
S3_FORCE_PATH_STYLE: true             # Replace with S3-compatible service connection information
S3_REGION: stub                       # Replace with S3-compatible service connection information
S3_PROTOCOL: https                    # Replace with S3-compatible service connection information

Reload Supabase configuration with the following command:

./app.yml -t app_config,app_launch

You can also use S3 as PostgreSQL backup repository by adding an aliyun backup repository definition in all.vars.pgbackrest_repo:

all:
  vars:
    pgbackrest_method: aliyun          # pgbackrest backup method: local,minio,[other user-defined repositories...], in this example backup is stored to MinIO
    pgbackrest_repo:                   # pgbackrest backup repository: https://pgbackrest.org/configuration.html#section-repository
      aliyun:                          # Define a new backup repository aliyun
        type: s3                       # Alibaba Cloud OSS is S3-compatible object storage
        s3_endpoint: oss-cn-beijing-internal.aliyuncs.com
        s3_region: oss-cn-beijing
        s3_bucket: pigsty-oss
        s3_key: xxxxxxxxxxxxxx
        s3_key_secret: xxxxxxxx
        s3_uri_style: host
        path: /pgbackrest
        bundle: y                         # bundle small files into a single file
        bundle_limit: 20MiB               # Limit for file bundles, 20MiB for object storage
        bundle_size: 128MiB               # Target size for file bundles, 128MiB for object storage
        cipher_type: aes-256-cbc          # enable AES encryption for remote backup repo
        cipher_pass: pgBackRest.MyPass    # Set an encryption password, pgBackrest backup repository encryption password
        retention_full_type: time         # retention full backup by time on minio repo
        retention_full: 14                # keep full backup for the last 14 days

Then specify using the aliyun backup repository in all.vars.pgbackrest_method and reset pgBackrest backup:

./pgsql.yml -t pgbackrest

Pigsty will switch the backup repository to external object storage. More backup configurations can refer to PostgreSQL Backup documentation.


Advanced Topic: Using SMTP

You can use SMTP to send emails by modifying the supabase application configuration and adding SMTP information:

all:
  children:
    supabase:        # supa group
      vars:          # supa group vars
        apps:        # supa group app list
          supabase:  # the supabase app
            conf:    # the supabase app conf entries
              SMTP_HOST: smtpdm.aliyun.com:80
              SMTP_PORT: 80
              SMTP_USER: [email protected]
              SMTP_PASS: your_email_user_password
              SMTP_SENDER_NAME: MySupabase
              SMTP_ADMIN_EMAIL: [email protected]
              ENABLE_ANONYMOUS_USERS: false

Don’t forget to use app.yml to reload the configuration


Advanced Topic: True High Availability

After these configurations, you have an enterprise-grade Supabase (basic single-machine version) with public domain, HTTPS certificate, SMTP, PITR backup, monitoring, IaC, and 400+ extensions. For high availability configuration, please refer to other parts of Pigsty documentation. If you’re too lazy to read and learn, we provide hands-on Supabase self-hosting expert consulting services — ¥2000 to save you from the hassle of tinkering and downloading.

Single-node RTO/RPO relies on external object storage services for fallback. If your node fails, backups are retained in external S3 storage, and you can redeploy Supabase on a new node and restore from backup. Such deployment can provide a minimum standard RTO (hour-level recovery time)/RPO (MB-level data loss) fallback disaster recovery level during failures.

To achieve RTO < 30s with zero data loss failover, you need to use multi-node high availability deployment, which involves:

  • ETCD: DCS needs three or more nodes to tolerate one node failure.
  • PGSQL: PostgreSQL synchronous commit mode without data loss, recommend using at least three nodes.
  • INFRA: Monitoring infrastructure failure has less impact, recommend using dual replicas in production
  • Supabase stateless containers themselves can also be multi-node replicas to achieve high availability.

In this case, you also need to modify PostgreSQL and MinIO access points to use DNS/L2 VIP/HAProxy and other high availability access points For these parts, you only need to refer to the documentation of each module in Pigsty for configuration and deployment. We recommend referring to the configurations in conf/ha/trio.yml and conf/ha/safe.yml to upgrade cluster scale to three nodes or more.

4 - Odoo

Self-Hosting Odoo, the Open Source ERP

Odoo is an open-source enterprise resource planning (ERP) software that provides a full suite of business applications, including CRM, sales, purchasing, inventory, production, accounting, and other management functions. Odoo is a typical web application that uses PostgreSQL as the underlying database.

All your business on one platform, Simple, efficient, yet affordable

The latest version of Odoo is 19.0


Quick Start

curl -fsSL https://repo.pigsty.io/get | bash -s v3.7.0; cd ~/pigsty
./bootstrap                # install ansible
./configure -c app/odoo    # use odoo config (please CHANGE CREDENTIALS in pigsty.yml)
./install.yml              # install pigsty
./docker.yml               # install docker compose
./app.yml                  # launch odoo stateless part with docker

The default credentials are admin : admin


Config Template

The conf/app/odoo.yml defines a template config file that defines the resources required for a single Odoo instance.

all:
  children:

    # the odoo application (default username & password: admin/admin)
    odoo:
      hosts: { 10.10.10.10: {} }
      vars:
        app: odoo   # specify app name to be installed (in the apps)
        apps:       # define all applications
          odoo:     # app name should have the corresponding ~/app/odoo folder
            file:   # optional directory to be created
              - { path: /data/odoo         ,state: directory, owner: 100, group: 101 }
              - { path: /data/odoo/webdata ,state: directory, owner: 100, group: 101 }
              - { path: /data/odoo/addons  ,state: directory, owner: 100, group: 101 }
            conf:   # override /opt/<app>/.env config file
              PG_HOST: 10.10.10.10            # postgres host
              PG_PORT: 5432                   # postgres port
              PG_USERNAME: odoo               # postgres user
              PG_PASSWORD: DBUser.Odoo        # postgres password
              ODOO_PORT: 8069                 # odoo app port
              ODOO_DATA: /data/odoo/webdata   # odoo webdata
              ODOO_ADDONS: /data/odoo/addons  # odoo plugins
              ODOO_DBNAME: odoo               # odoo database name
              ODOO_VERSION: 19.0              # odoo image version

    # the odoo database
    pg-odoo:
      hosts: { 10.10.10.10: { pg_seq: 1, pg_role: primary } }
      vars:
        pg_cluster: pg-odoo
        pg_users:
          - { name: odoo    ,password: DBUser.Odoo ,pgbouncer: true ,roles: [ dbrole_admin ] ,createdb: true ,comment: admin user for odoo service }
          - { name: odoo_ro ,password: DBUser.Odoo ,pgbouncer: true ,roles: [ dbrole_readonly ]  ,comment: read only user for odoo service  }
          - { name: odoo_rw ,password: DBUser.Odoo ,pgbouncer: true ,roles: [ dbrole_readwrite ] ,comment: read write user for odoo service }
        pg_databases:
          - { name: odoo ,owner: odoo ,revokeconn: true ,comment: odoo main database  }
        pg_hba_rules:
          - { user: all ,db: all ,addr: 172.17.0.0/16  ,auth: pwd ,title: 'allow access from local docker network' }
          - { user: dbuser_view , db: all ,addr: infra ,auth: pwd ,title: 'allow grafana dashboard access cmdb from infra nodes' }

    infra: { hosts: { 10.10.10.10: { infra_seq: 1 } } }
    etcd:  { hosts: { 10.10.10.10: { etcd_seq: 1 } }, vars: { etcd_cluster: etcd } }
    #minio: { hosts: { 10.10.10.10: { minio_seq: 1 } }, vars: { minio_cluster: minio } }

  vars:                               # global variables
    version: v3.7.0                   # pigsty version string
    admin_ip: 10.10.10.10             # admin node ip address
    region: default                   # upstream mirror region: default|china|europe
    node_tune: oltp                   # node tuning specs: oltp,olap,tiny,crit
    pg_conf: oltp.yml                 # pgsql tuning specs: {oltp,olap,tiny,crit}.yml

    docker_enabled: true              # enable docker on app group
    #docker_registry_mirrors: ["https://docker.m.daocloud.io"] # use dao cloud mirror in mainland china
    proxy_env:                        # global proxy env when downloading packages & pull docker images
      no_proxy: "localhost,127.0.0.1,10.0.0.0/8,192.168.0.0/16,*.pigsty,*.aliyun.com,mirrors.*,*.tsinghua.edu.cn"
      #http_proxy:  127.0.0.1:12345 # add your proxy env here for downloading packages or pull images
      #https_proxy: 127.0.0.1:12345 # usually the proxy is format as http://user:[email protected]
      #all_proxy:   127.0.0.1:12345

    infra_portal: # domain names and upstream servers
      home         : { domain: h.pigsty }
      grafana      : { domain: g.pigsty ,endpoint: "${admin_ip}:3000" , websocket: true }
      prometheus   : { domain: p.pigsty ,endpoint: "${admin_ip}:9058" }
      alertmanager : { domain: a.pigsty ,endpoint: "${admin_ip}:9059" }
      blackbox     : { endpoint: "${admin_ip}:9115" }
      loki         : { endpoint: "${admin_ip}:3100" }
      minio        : { domain: m.pigsty    ,endpoint: "${admin_ip}:9001" ,scheme: https ,websocket: true }
      odoo         : { domain: odoo.pigsty, endpoint: "127.0.0.1:8069"   ,websocket: true }  #cert: /path/to/crt ,key: /path/to/key
      # setup your own domain name here ^^^, or use default domain name, or ip + 8069 port direct access
      # certbot --nginx --agree-tos --email [email protected] -n -d odoo.your.domain    # replace with your email & odoo domain

    #----------------------------------#
    # Credential: CHANGE THESE PASSWORDS
    #----------------------------------#
    #grafana_admin_username: admin
    grafana_admin_password: pigsty
    #pg_admin_username: dbuser_dba
    pg_admin_password: DBUser.DBA
    #pg_monitor_username: dbuser_monitor
    pg_monitor_password: DBUser.Monitor
    #pg_replication_username: replicator
    pg_replication_password: DBUser.Replicator
    #patroni_username: postgres
    patroni_password: Patroni.API
    #haproxy_admin_username: admin
    haproxy_admin_password: pigsty

    repo_modules: infra,node,pgsql,docker
    repo_packages: [ node-bootstrap, infra-package, infra-addons, node-package1, node-package2, pgsql-utility, docker ]
    repo_extra_packages: [ pg18-main ]
    pg_version: 18

Basics

Check .env file for configurable environment variables:

# https://hub.docker.com/_/odoo#
PG_HOST=10.10.10.10
PG_PORT=5432
PG_USER=dbuser_odoo
PG_PASS=DBUser.Odoo
ODOO_PORT=8069

Then launch odoo with:

make up  # docker compose up

Visit http://ddl.pigsty or http://10.10.10.10:8887

Makefile

make up         # pull up odoo with docker compose in minimal mode
make run        # launch odoo with docker , local data dir and external PostgreSQL
make view       # print odoo access point
make log        # tail -f odoo logs
make info       # introspect odoo with jq
make stop       # stop odoo container
make clean      # remove odoo container
make pull       # pull latest odoo image
make rmi        # remove odoo image
make save       # save odoo image to /tmp/docker/odoo.tgz
make load       # load odoo image from /tmp/docker/odoo.tgz

Use External PostgreSQL

You can use external PostgreSQL for Odoo. Odoo will create its own database during setup, so you don’t need to do that

pg_users: [ { name: dbuser_odoo ,password: DBUser.Odoo ,pgbouncer: true ,roles: [ dbrole_admin ]    ,comment: admin user for odoo database } ]
pg_databases: [ { name: odoo ,owner: dbuser_odoo ,revokeconn: true ,comment: odoo primary database } ]

And create business user & database with:

bin/pgsql-user  pg-meta  dbuser_odoo
#bin/pgsql-db    pg-meta  odoo     # odoo will create the database during setup

Check connectivity:

psql postgres://dbuser_odoo:[email protected]:5432/odoo

Expose Odoo Service

Expose odoo seb service via nginx portal:

    infra_portal:                     # domain names and upstream servers
      home         : { domain: h.pigsty }
      grafana      : { domain: g.pigsty    ,endpoint: "${admin_ip}:3000" , websocket: true }
      prometheus   : { domain: p.pigsty    ,endpoint: "${admin_ip}:9058" }
      alertmanager : { domain: a.pigsty    ,endpoint: "${admin_ip}:9059" }
      blackbox     : { endpoint: "${admin_ip}:9115" }
      loki         : { endpoint: "${admin_ip}:3100" }
      odoo         : { domain: odoo.pigsty, endpoint: "127.0.0.1:8069", websocket: true }  # <------ add this line
./infra.yml -t nginx   # setup nginx infra portal

Odoo Addons

There are lots of Odoo modules available in the community, you can install them by downloading and placing them in the addons folder.

volumes:
  - ./addons:/mnt/extra-addons

You can mount the ./addons dir to the /mnt/extra-addons in the container, then download and unzip to the addons folder,

To enable addon module, first enter the Developer mode

Settings -> Generic Settings -> Developer Tools -> Activate the developer Mode

Then go to the > Apps -> Update Apps List, then you can find the extra addons and install from the panel.

Frequently used free addons: Accounting Kit


Demo

Check public demo: http://odoo.pigsty.io, username: [email protected], password: pigsty

If you want to access odoo through SSL, you have to trust files/pki/ca/ca.crt on your browser (or use the dirty hack thisisunsafe in chrome)

Feedback

5 - Dify

setup docker with playbook

Dify is a generative AI application innovation engine and open-source LLM application development platform. It provides capabilities from Agent construction to AI workflow orchestration, RAG retrieval, and model management, helping users easily build and operate generative AI-native applications.

Pigsty provides support for self-hosting Dify, allowing you to deploy Dify with a single command while storing critical state in externally managed PostgreSQL. You can use pgvector in the same PostgreSQL instance as a vector database, further simplifying deployment.

Pigsty v3.7.0 ships the Dify v1.8.1 application template.


Quick Start

On a fresh Linux x86 / ARM server running a compatible distribution, execute:

curl -fsSL https://repo.pigsty.cc/get | bash -s v3.7.0; cd ~/pigsty
./bootstrap                # Install Pigsty dependencies
./configure -c app/dify    # Use Dify configuration template
vi pigsty.yml              # edit passwords, domain, keys, etc.

./install.yml              # Install Pigsty
./docker.yml               # Install Docker & Compose
./app.yml                  # Install Dify

Dify listens on port 5001 by default. You can access it via browser at http://<ip>:5001 and set up your initial user credentials to log in.

After Dify starts, you can install various extensions, configure system models, and begin using it!


Why Self-Host

There are many reasons to self-host Dify, but the primary motivation is data security. The DockerCompose template provided by Dify uses basic default database images, lacking enterprise-grade features like high availability, disaster recovery, monitoring, IaC, and PITR capabilities.

Pigsty elegantly solves these issues for Dify, deploying all components with a single command based on configuration files, and using mirrors to resolve China region access challenges. This makes Dify deployment and delivery incredibly smooth. It handles PostgreSQL master database, PGVector vector database, MinIO object storage, Redis, Prometheus monitoring, Grafana visualization, Nginx reverse proxy, and free HTTPS certificates in one go.

Pigsty ensures all Dify state is stored in externally managed services, including metadata in PostgreSQL and other data in the filesystem. Therefore, the Dify instance launched via Docker Compose becomes a stateless application that can be destroyed and rebuilt at any time, greatly simplifying operations.


Installation

Let’s start with single-node Dify deployment. We’ll cover production high-availability deployment methods later.

First, use Pigsty’s standard installation process to install the PostgreSQL instance required by Dify:

curl -fsSL https://repo.pigsty.cc/get | bash -s v3.7.0; cd ~/pigsty
./bootstrap               # Prepare Pigsty dependencies
./configure -c app/dify   # Use Dify application template
vi pigsty.yml             # Edit config file, modify domain and passwords
./install.yml             # Install Pigsty and various databases

When you use the ./configure -c app/dify command, Pigsty automatically generates the configuration file based on the conf/app/dify.yml template and your current environment. You should modify passwords, domain, and other relevant parameters in the generated pigsty.yml configuration file according to your actual needs, then use ./install.yml to execute the standard installation process.

Next, run docker.yml to install Docker and Docker Compose, then use app.yml to complete Dify deployment:

./docker.yml              # Install Docker and Docker Compose
./app.yml                 # Deploy Dify stateless components using Docker

You can access the Dify Web management interface at http://<your_ip_address>:5001 on your local network.

Default username, email, and password will be prompted for setup on first login.

You can also use the locally resolved placeholder domain dify.pigsty, or follow the configuration below to use a real domain with HTTPS certificates.


Configuration

When you use the ./configure -c app/dify command for configuration, Pigsty automatically generates the configuration file based on the conf/app/dify.yml template and your current environment. Here’s a detailed explanation of the default configuration:

all:
  children:

    # the dify application
    dify:
      hosts: { 10.10.10.10: {} }
      vars:
        app: dify   # specify app name to be installed (in the apps)
        apps:       # define all applications
          dify:     # app name, should have corresponding ~/pigsty/app/dify folder
            file:   # data directory to be created
              - { path: /data/dify ,state: directory ,mode: 0755 }
            conf:   # override /opt/dify/.env config file

              # change domain, mirror, proxy, secret key
              NGINX_SERVER_NAME: dify.pigsty
              # A secret key for signing and encryption, gen with `openssl rand -base64 42` (CHANGE PASSWORD!)
              SECRET_KEY: sk-9f73s3ljTXVcMT3Blb3ljTqtsKiGHXVcMT3BlbkFJLK7U
              # expose DIFY nginx service with port 5001 by default
              DIFY_PORT: 5001
              # where to store dify files? the default is ./volume, we'll use another volume created above
              DIFY_DATA: /data/dify

              # proxy and mirror settings
              #PIP_MIRROR_URL: https://pypi.tuna.tsinghua.edu.cn/simple
              #SANDBOX_HTTP_PROXY: http://10.10.10.10:12345
              #SANDBOX_HTTPS_PROXY: http://10.10.10.10:12345

              # database credentials
              DB_USERNAME: dify
              DB_PASSWORD: difyai123456
              DB_HOST: 10.10.10.10
              DB_PORT: 5432
              DB_DATABASE: dify
              VECTOR_STORE: pgvector
              PGVECTOR_HOST: 10.10.10.10
              PGVECTOR_PORT: 5432
              PGVECTOR_USER: dify
              PGVECTOR_PASSWORD: difyai123456
              PGVECTOR_DATABASE: dify
              PGVECTOR_MIN_CONNECTION: 2
              PGVECTOR_MAX_CONNECTION: 10

    pg-meta:
      hosts: { 10.10.10.10: { pg_seq: 1, pg_role: primary } }
      vars:
        pg_cluster: pg-meta
        pg_users:
          - { name: dify ,password: difyai123456 ,pgbouncer: true ,roles: [ dbrole_admin ] ,superuser: true ,comment: dify superuser }
        pg_databases:
          - { name: dify ,owner: dify ,revokeconn: true ,comment: dify main database  }
        pg_hba_rules:
          - { user: dify ,db: all ,addr: 172.17.0.0/16  ,auth: pwd ,title: 'allow dify access from local docker network' }
        node_crontab: [ '00 01 * * * postgres /pg/bin/pg-backup full' ] # make a full backup every 1am

    infra: { hosts: { 10.10.10.10: { infra_seq: 1 } } }
    etcd:  { hosts: { 10.10.10.10: { etcd_seq: 1 } }, vars: { etcd_cluster: etcd } }
    #minio: { hosts: { 10.10.10.10: { minio_seq: 1 } }, vars: { minio_cluster: minio } }

  vars:                               # global variables
    version: v3.7.0                   # pigsty version string
    admin_ip: 10.10.10.10             # admin node ip address
    region: default                   # upstream mirror region: default|china|europe
    node_tune: oltp                   # node tuning specs: oltp,olap,tiny,crit
    pg_conf: oltp.yml                 # pgsql tuning specs: {oltp,olap,tiny,crit}.yml

    docker_enabled: true              # enable docker on app group
    #docker_registry_mirrors: ["https://docker.1ms.run"] # use mirror in mainland china

    proxy_env:                        # global proxy env when downloading packages & pull docker images
      no_proxy: "localhost,127.0.0.1,10.0.0.0/8,192.168.0.0/16,*.pigsty,*.aliyun.com,mirrors.*,*.tsinghua.edu.cn"
      #http_proxy:  127.0.0.1:12345 # add your proxy env here for downloading packages or pull images
      #https_proxy: 127.0.0.1:12345 # usually the proxy is format as http://user:[email protected]
      #all_proxy:   127.0.0.1:12345

    infra_portal: # domain names and upstream servers
      home         : { domain: h.pigsty }
      grafana      : { domain: g.pigsty ,endpoint: "${admin_ip}:3000" , websocket: true }
      prometheus   : { domain: p.pigsty ,endpoint: "${admin_ip}:9058" }
      alertmanager : { domain: a.pigsty ,endpoint: "${admin_ip}:9059" }
      blackbox     : { endpoint: "${admin_ip}:9115" }
      loki         : { endpoint: "${admin_ip}:3100" }
      #minio        : { domain: m.pigsty    ,endpoint: "${admin_ip}:9001" ,scheme: https ,websocket: true }
      dify:                            # nginx server config for dify
        domain: dify.pigsty            # REPLACE WITH YOUR OWN DOMAIN!
        endpoint: "10.10.10.10:5001"   # dify service endpoint: IP:PORT
        websocket: true                # add websocket support
        certbot: dify.pigsty           # certbot cert name, apply with `make cert`

    #----------------------------------#
    # Credential: CHANGE THESE PASSWORDS
    #----------------------------------#
    #grafana_admin_username: admin
    grafana_admin_password: pigsty
    #pg_admin_username: dbuser_dba
    pg_admin_password: DBUser.DBA
    #pg_monitor_username: dbuser_monitor
    pg_monitor_password: DBUser.Monitor
    #pg_replication_username: replicator
    pg_replication_password: DBUser.Replicator
    #patroni_username: postgres
    patroni_password: Patroni.API
    #haproxy_admin_username: admin
    haproxy_admin_password: pigsty
    #minio_access_key: minioadmin
    minio_secret_key: minioadmin      # minio root secret key, `minioadmin` by default

    repo_extra_packages: [ pg17-main ]
    pg_version: 17

Checklist

Here’s a checklist of configuration items you need to focus on:

  • Hardware/Software: Prepare required machine resources: Linux x86_64/arm64 server, fresh installation of mainstream Linux operating systems
  • Network/Permissions: SSH passwordless login access, user has passwordless sudo privileges
  • Ensure machine has static IPv4 network address in internal network and can access internet
  • If accessing via public network, ensure you have an available domain name pointing to the current node’s public IP address
  • Ensure using app/dify config template and modify parameters as needed
    • configure -c app/dify, and enter node’s internal primary IP address, or specify via -i <primary_ip> command line parameter
  • Have you modified all password-related configuration parameters?【Optional】
  • Have you modified PostgreSQL cluster business user passwords and app configurations using these passwords?
    • Default username dify and password difyai123456 are generated by Pigsty for Dify, please modify according to actual situation
    • In Dify’s configuration block, please modify DB_USERNAME, DB_PASSWORD, PGVECTOR_USER, PGVECTOR_PASSWORD and other parameters accordingly
  • Have you modified Dify’s default encryption key?
    • You can use openssl rand -base64 42 to randomly generate a password string and fill it in the SECRET_KEY parameter
  • Have you modified the domain used by Dify?
    • Replace placeholder domain dify.pigsty with your actual domain, e.g. dify.pigsty.cc
    • You can use sed -ie 's/dify.pigsty/dify.pigsty.cc/g' pigsty.yml to modify Dify’s domain

Domain & SSL

If you want to use a real domain with HTTPS certificates, you need to modify in the pigsty.yml configuration file:

  • infra_portal parameter’s dify domain
  • Best to specify an email address certbot_email for receiving certificate expiration notifications
  • Configure Dify’s NGINX_SERVER_NAME parameter to specify your actual domain
all:
  children:                            # Cluster definition
    dify:                              # Dify group
      vars:                            # Dify group variables
        apps:                          # Application configuration
          dify:                        # Dify application definition
            conf:                      # Dify application configuration
              NGINX_SERVER_NAME: dify.pigsty

  vars:                                # Global parameters
    #certbot_sign: true                # Use Certbot to apply for free HTTPS certificate
    certbot_email: [email protected]      # Email for certificate application, used for expiration notifications, optional
    infra_portal:                      # Configure Nginx server
      dify:                            # Dify server definition
        domain: dify.pigsty            # Please replace with your own domain here!
        endpoint: "10.10.10.10:5001"   # Please specify Dify's IP and port here (default auto-configured)
        websocket: true                # Dify needs websocket enabled
        certbot: dify.pigsty           # Specify Certbot certificate name

Use the following command to apply for Nginx certificates:

# Apply for certificates, can also manually execute /etc/nginx/sign-cert script
make cert

# The above Makefile shortcut command actually executes the following playbook tasks:
./infra.yml -t nginx_certbot,nginx_reload -e certbot_sign=true

Execute app.yml playbook to redeploy Dify service to make NGINX_SERVER_NAME configuration take effect.

./app.yml

File Backup

You can use restic to back up Dify’s filesystem. Dify’s data files are in the /data/dify directory. You can use the following commands to backup:

export RESTIC_REPOSITORY=/data/backups/dify   # Specify dify backup directory
export RESTIC_PASSWORD=some-strong-password   # Specify backup encryption password
mkdir -p ${RESTIC_REPOSITORY}                 # Create dify backup directory
restic init

After creating the Restic backup repository, you can use the following commands to backup Dify:

export RESTIC_REPOSITORY=/data/backups/dify   # Specify dify backup directory
export RESTIC_PASSWORD=some-strong-password   # Specify backup encryption password

restic backup /data/dify                      # Backup /dify data directory to repository
restic snapshots                              # View backup snapshot list
restic restore -t /data/dify 0b11f778         # Restore snapshot xxxxxx to /data/dify
restic check                                  # Periodically check repository integrity

Another more reliable way is to use JuiceFS to mount MinIO object storage to the /data/dify directory, so you can use MinIO/S3 to store file state.

If you want to store all data in PostgreSQL, consider “Using JuiceFS to store filesystem data in PostgreSQL”

For example, you can create another dify_fs database and use it as JuiceFS’s metadata storage:

METAURL=postgres://dify:difyai123456@:5432/dify_fs
OPTIONS=(
  --storage postgres
  --bucket :5432/dify_fs
  --access-key dify
  --secret-key difyai123456
  ${METAURL}
  jfs
)
juicefs format "${OPTIONS[@]}"         # Create a PG filesystem
juicefs mount ${METAURL} /data/dify -d # Mount to /data/dify directory in background
juicefs bench /data/dify               # Test performance
juicefs umount /data/dify              # Stop mounting

Reference